SQL – Insert non-existent value to a table from another table

Case study:

You have table A which has a column named ‘code’ and then you have another table called B which has a foreign key relationship with table A on column ‘code’. We want to select all rows in table A that table B does not have which in this case row bbb and ccc.

example: 

Table A:

CODE
aaa
bbb
ccc

Table B:

CODE
aaa

Solution:

SELECT A.CODE FROM A WHERE CODE NOT IN(SELECT CODE FROM B ) 

Flutter: Null Safety Solutions

Sometimes there is a dependency that does not conform to a null safety but we cannot do anything since it is in the dependency package. So what can we do to solve it?

First, we need to understand what null safety is. And then also understand what the problem will be. If you are sure that you want to run the app with unsound null safety that we can use the following command:

flutter run –no-sound-null-safety

OR 

you can configure your IDE to enable your app to run with unsound null safety.

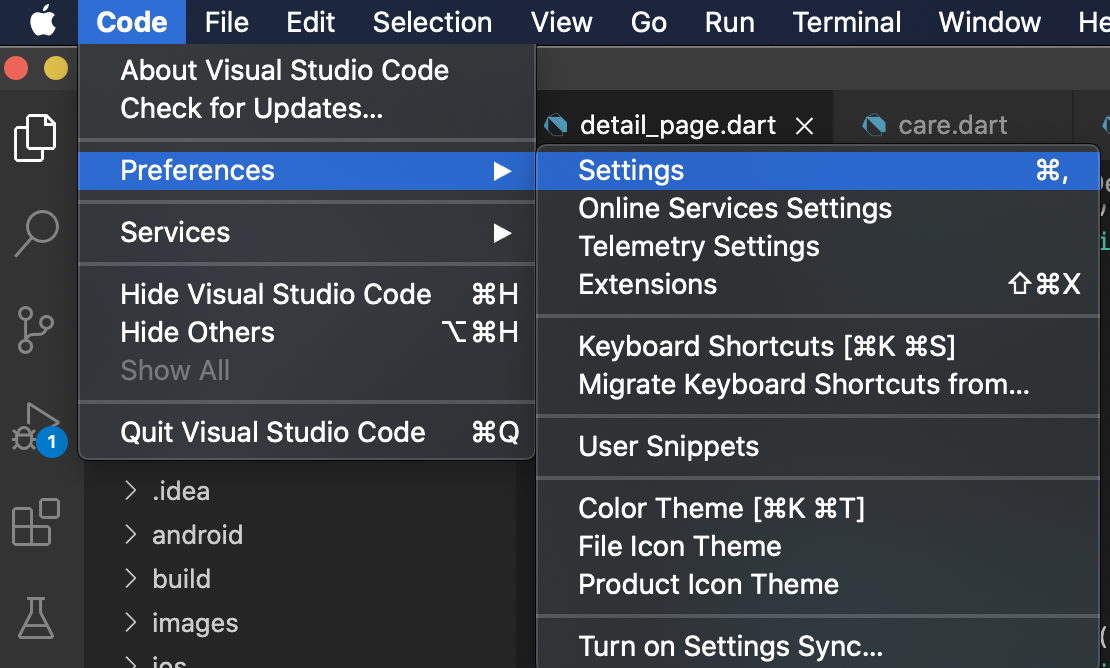
In VS CODE search for flutter run additional args in your user settings and then add –no-sound-null-safety

  1. Go to Settings. In Mac you can find as in this picture.

2. Search for “Flutter run additional args” 

3. Then click “Add Item”

4. Now type “–no-sound-null-safety”

5. Click ok

Information about unsound null safety is in this link.

Install cocoapods for flutter dev

There is a time when you run ‘flutter doctor’ and then you got this problem below. 

[!] Xcode - develop for iOS and macOS
    ! CocoaPods 1.8.4 out of date (1.10.0 is recommended).
        CocoaPods is used to retrieve the iOS and macOS platform side's plugin
        code that responds to your plugin usage on the Dart side.
        Without CocoaPods, plugins will not work on iOS or macOS.
        For more info, see https://flutter.dev/platform-plugins
      To upgrade see
      https://guides.cocoapods.org/using/getting-started.html#installation for
      instructions.

It means that you need to install cocoapods. Well it is a pretty clear message right. And if you follow the link, you will be asked to execute this command below:

sudo gem install cocoapods

But when I executed this piece of command line, I got another error message which was:

ERROR:  Error installing cocoapods:
        ERROR: Failed to build gem native extension.

Solution:

brew cleanup -d -v 

brew install cocoapods

And hopefully you will not encountered any other issues while installing the cocoapods. In my case I need to do extra overwrite the link such as this:

brew link --overwrite cocoapods

Then tried to run the ‘flutter doctor’ again and check if there is no more error.

XML vs JSON

ParametersXMLJSON
AbbreviationExtensible Markup LanguageJavaScript Object Notation
SyntaxIt is structured as a tree (tags and nodes)It is structured as key and value pairs
Namespace supportIt supports namespace.It does not support namespace.
Array SupportIt does not support an array.It supports an array.
SpeedBulky and slow in parsing, leading to slower data transmissionVery fast as the size of the file is considerably small, faster parsing by the JavaScript engine and hence faster transfer of data
SecurityXML structures are prone to some attacks as external entity expansion and DTD validation are enabled by default. When these are disabled, XML parsers are safer.JSON parsing is safe almost all the time except if JSONP is used, which can lead to a Cross-Site Request Forgery (CSRF) attack.
Data Types SupportSupports many complex data types including charts, images, and other non-primitive data types.JSON supports only strings, numbers, arrays Boolean, and objects. Even objects can only contain primitive types.
UTF SupportXML supports UTF-8 and UTF-16 encodings.JSON supports UTF as well as ASCII encodings.

It is not only about End to End Automation

How many times have you encountered when you are discussing automation in software testing or test (check) automation and the other party always refers it to e2e (end to end) automation? In my case, almost all the time.

It is true, for some reason recruiters, testers, interviewers, managers, developers, and maybe others thought that automation is merely about simulating the end user’s behaviors from the application.

So therefore when they put a job offer as a test automation engineer, it mostly contains a skill list of selenium and BDD (Behaviour Driven Development). Is it because of the name? (what is in the name?) 

Test Automation Engineer is more than just building an End to End automation. I personally think the test automation engineer’s job is to make the work of testing easier and more efficient. It can include preparing test and staging environment, preparing test data,  make sure that the data are consistent through the whole chain, make a deployment script, make a database script, automate notifications, automate test reports, and a lot of others. 

Let me give you an example: several years ago (in 2013) I was a software tester for a company that offers a framework to build a portal or dashboard or application which enables the non-technical person to build it themselves with minimum help from developers. The framework is required to be deployed to the application/web server chosen by the client. The list of application servers is huge including WebSphere, WebLogic, JBoss, and Tomcat (and some more with different versions). It also needs to run a database script to database server which is supported such as MySQL, MSSQL Server, DB2, and Oracle. And we can start testing the application just after we deployed the framework, run the database script, and set the configuration. So we can see all the possible combination matrixes and if you have experienced deploying packages to WebLogic, WebSphere, and JBoss, you will understand the hell of it. 

In this case, automation is really needed to automate the deployment, the database script execution, and to set the configurations. In this case, the tester will be able to focus on testing the application on the different possibilities of combination without being bothered by all of the nitty-gritty of the pre-requisite work.  

Another example I had when I work as a Chain tester in 2019.  It is not an easy test such as you access the web application, do something, and then see the output from the application itself. It was a complex systems consisting multiple applications and backends. It has queueing mechanism and it also has several front applications.

In order to start the actual testing, I had to create many test data in several systems and these data needs to be valid and synchronised. The test preparation itself when it is done by hand took several days (and dont forget that different systems are owned by different department – which made it even longer to prepare). In this case, automation comes in handy to prepare all of those data in different systems and check if they are valid and synchronised. So the tester will be able to focus to the actual test execution.

I used these two examples are representative to show that automation in software testing is much more than just End to End Automation. In fact, IMHO E2E automation is not the biggest picture of automation but people made it so. 

What do you think?
How to show SpecFlow feature files in VS2019 MacOS?

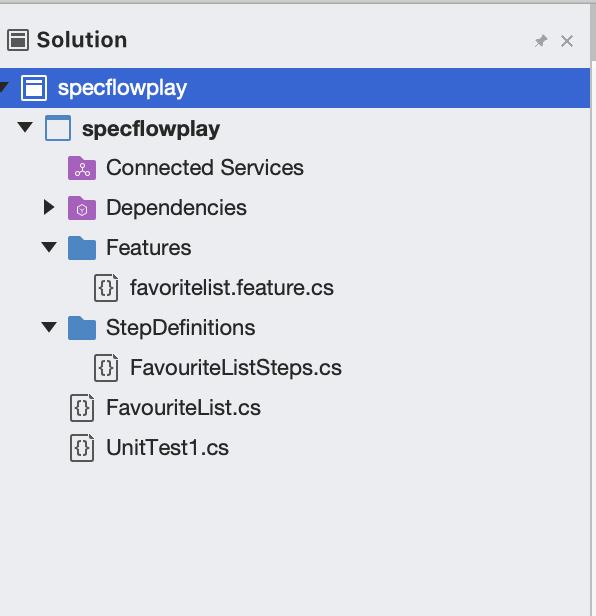
Problem: SpecFlow feature files in VisualStudio 2019 for macOS don’t show up in the solution explorer. Rebuild, Unload, and Reload do not help. It just shows the generated .cs file but not the features file.

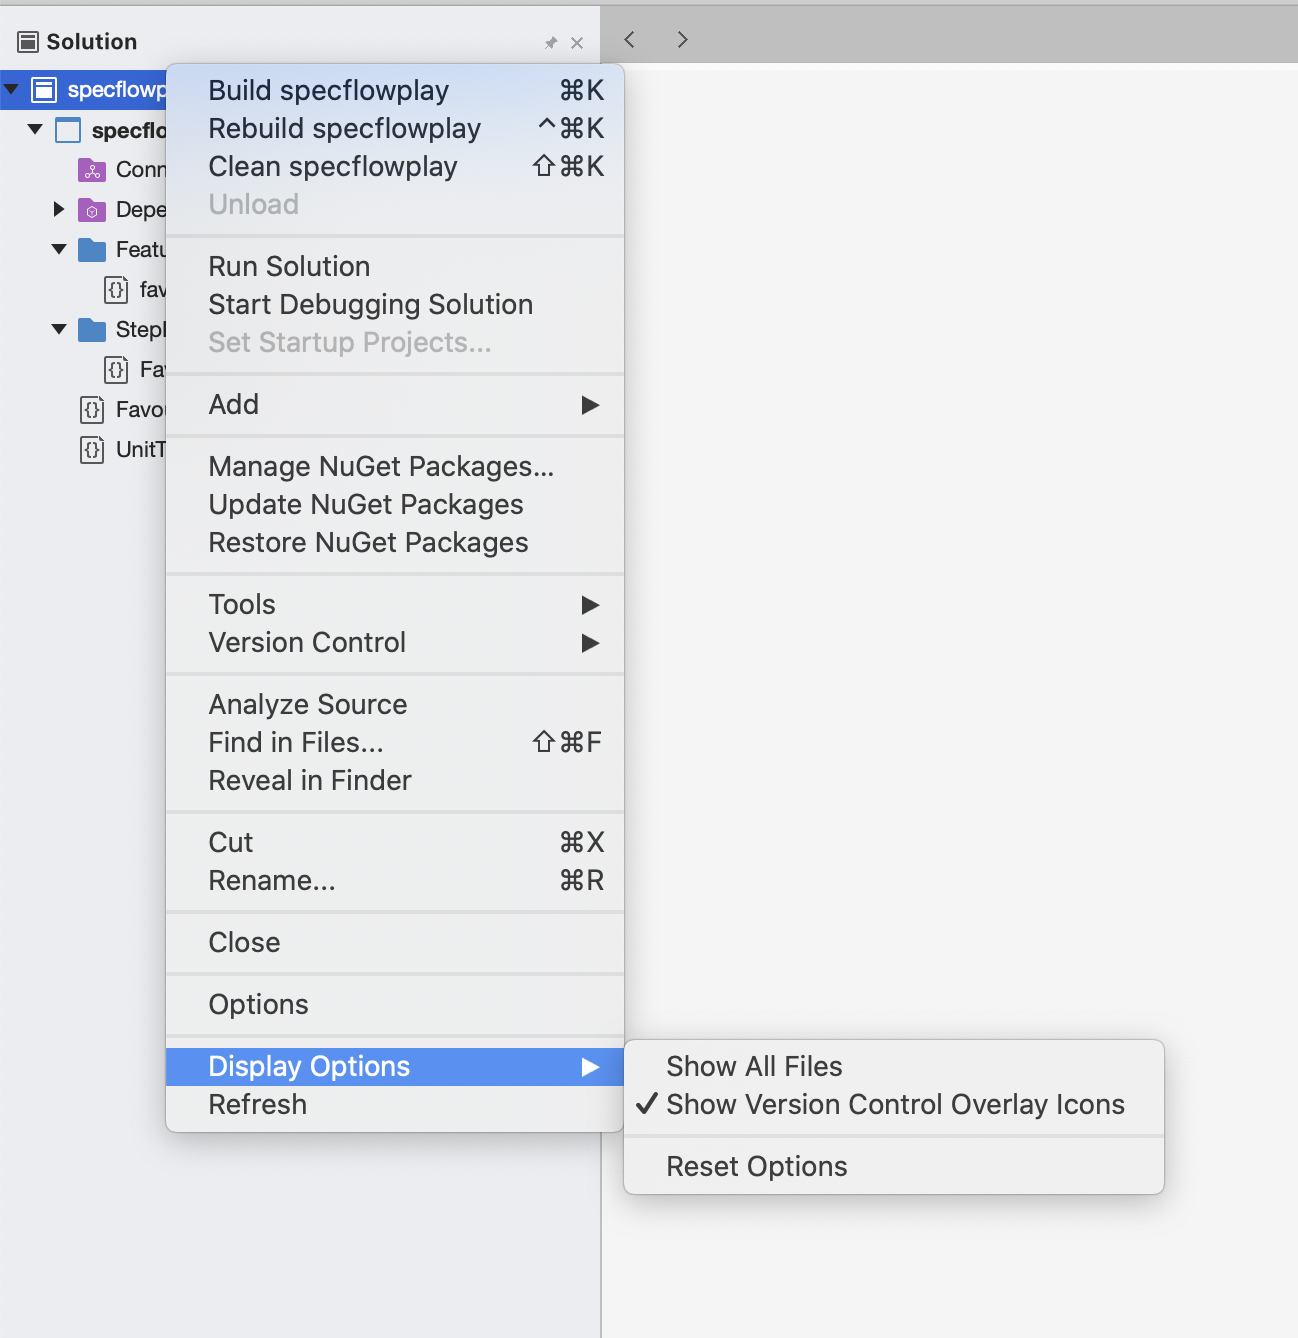
Solution: It turns out it is a common problem and people are still looking for the answer. This is the workaround I found and so far it is working for me.  Right-click the project > Display Options > Show All Files

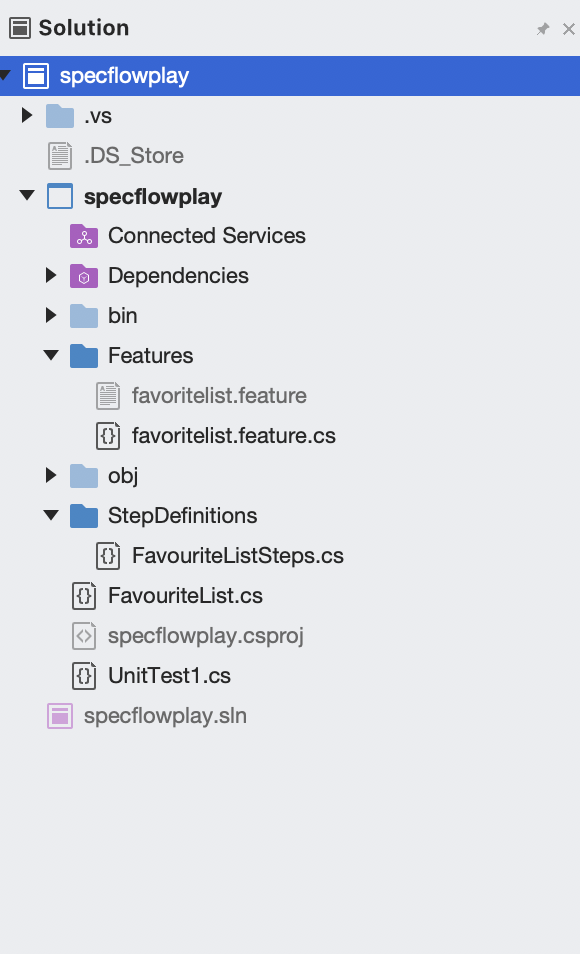
After that, I am able to see my feature file.

Setup SpecFlow in MacOS with VisualStudio 2019

I was excited when .NET finally released VisualStudio 2019 for macOS. So I installed it in order to be able to work with SpecFlow. Unfortunately, SpecFlow does not have a plugin for macOS.

After some search, I finally found there is a plugin for SpecFlow for macOS. It is just not officially built by the SpecFlow itself. 

Create a project in MacOS with VS2019:

  1. Create a new Project with type NUnit
  2. Choose the version of .NET core ( I chose 3.1)
  3. Set the project name and location

Install the SpecFlow extension

  1. Download the extension from in https://github.com/straighteight/SpecFlow-VS-Mac-Integration
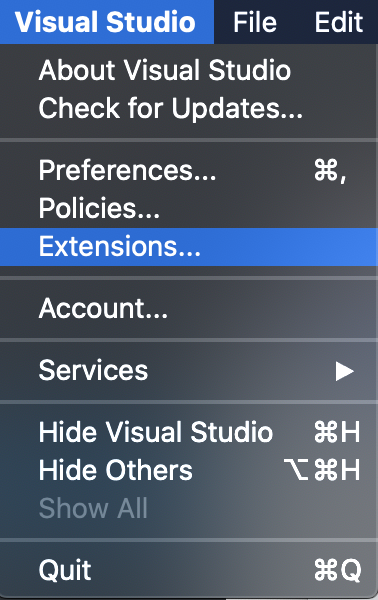
  2. go to menu Visual Studio > Extension. 
  3. The extension manager will be displayed and then click the “Install from file”. It will install the SpecFlow extension.

Add SpecFlow NuGet packages to Project:

  1. Right-click the project > Manage Nuget Packages
  2. Type SpecFlow in the search bar
  3. Choose SpecFlow, SpecFlow NUnit, SpecFlow.Tools.MSBuild.Generation

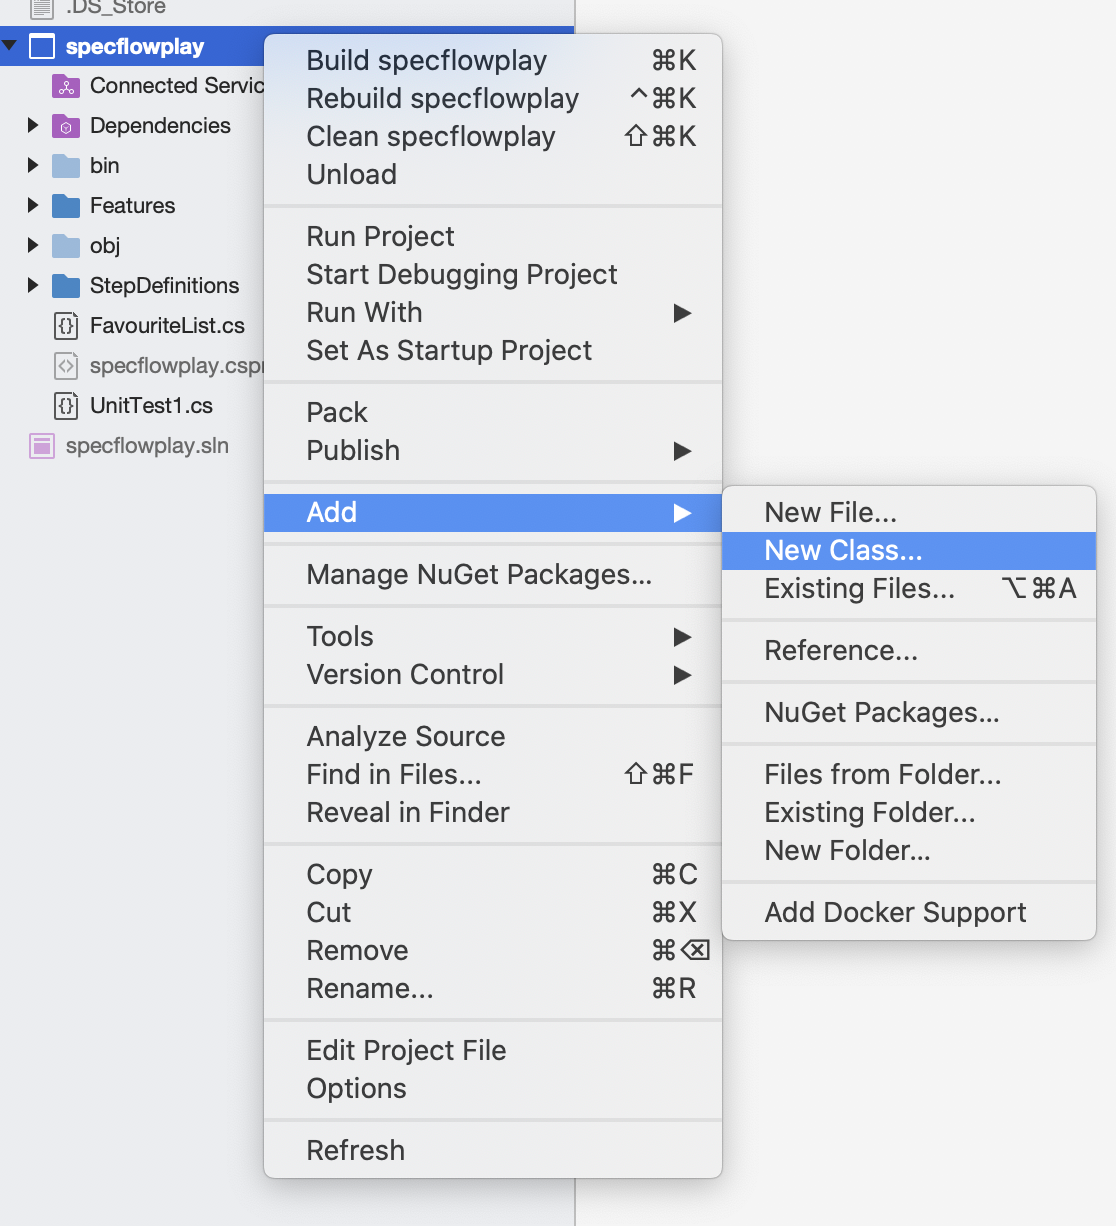
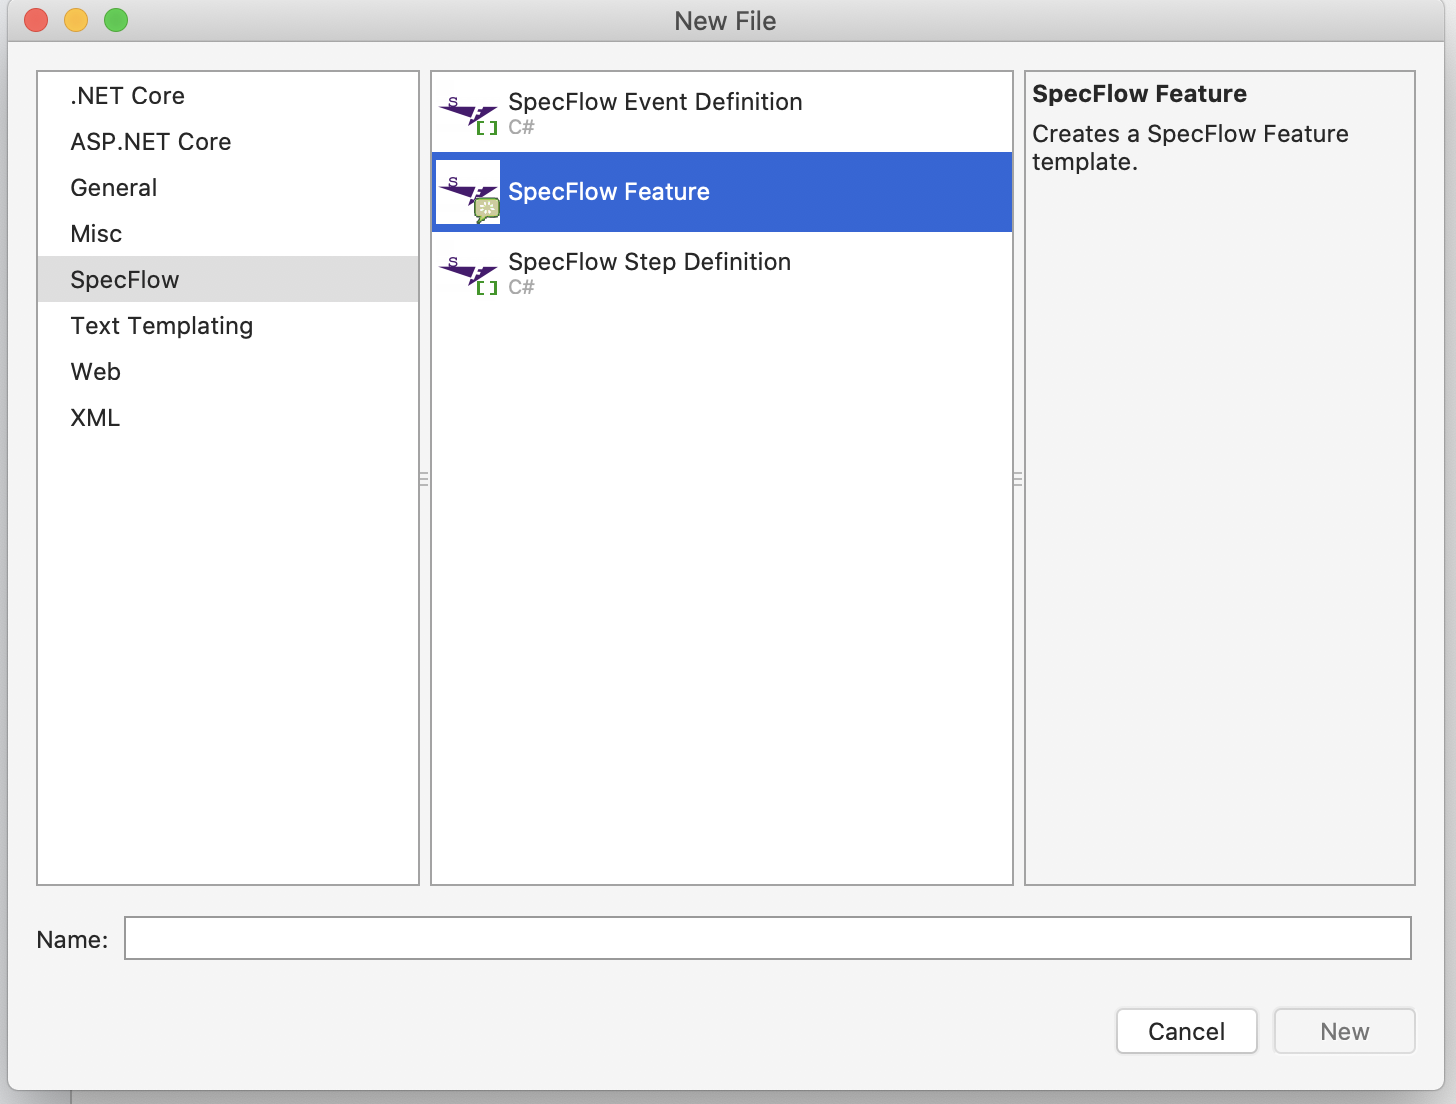
Add Feature Files:

The only thing that I am missing here is the auto-generation of a step definition. The extension does not have that capability. Therefore, we need to make it ourselves.